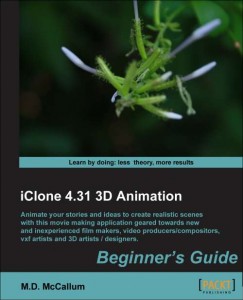
Description: - Turn facial images into 3D heads - Customize and change your character’s body and appearance - Use all kinds of awesome tools to animate your character - Quickly create beautiful 3D environments - Do camerawork like a pro - Adjust lighting and use effects to refine your production - Use the timeline to fine-tune all of your work to perfection Pack includes: 43 Video (5 hours)
Description:4 Environment Editing Tutorials - Get Started with the Camera & Timeline These tutorials will show you lots of very important tools in CrazyTalk Animator 2 while guiding you through the initial creation process with a few extra tips along the way. So what are you waiting for? Get started! 5 Character Creation Tutorials - Ready Your Actors These tutorials will guide you through the initial character creation process; showing you how to create animated characters from everyday images and photographs, adjusting the eyes and teeth settings, and how to remove the background of your original images to later add your own custom backdrops. 8 Motion & Animation Tutorials - Create Your Own Animations These tutorials focus on the various powerful and intuitive motion tools found inside CrazyTalk Animator 2. Learn everything from body and facial puppeteering to sprite and layer animation, deforming body parts, and the awesome new 3D Motion Key Editor! Once you've created your animations, you can save them in order to edit further at a later date, or to apply to any character you like. Design Resources and Project Files - Instant Hands-on Experience The Training DVD also includes a unique selection of design files, animations and project files that were actually used in the tutorial videos. These deliver a highly interactive experience complete with character creations and ready-made animations. You may use these project files, take them apart, and customize them to your own needs while getting a first hand lesson in CrazyTalk Animator 2! Pack includes: 17 Training Videos + Design Resources and Project Files
The iClone Fundamental training videos bring you the best starting point for learning the powers and capabilities of iClone 3D animation. Easily navigate through the fog of learning with this systematic, step-by-step training course that has been developed by industry expert – Alan Marques, who has acquired a life-time of experience with iClone real-time animation. Get all the answers right away with these well designed, easy to follow, indexed training videos.
PopcornFX Tools exclusively designed for iClone particle creation, allowing for quick VFX generation without the need to code a single line. They are fully integrated with iClone physics, global illumination, self-cast shadows, as well as textures, sprites and mesh import for maximum flexibility.
Distortion Emitter
Distortion Emitter generates transparent particles to simulate water, heat or ripples. The visual illusion is caused by the refraction of normal images. Realistic visual effects can be achieved by using animated image sprites, or transforming them during their lifetime.
Text Emitter
The Text Tools are designed for creating text animations like; Titling, Teleprompting, Scrolling Descriptions or to work as Text Labeling in any 3D Stage. Sequentially display multiple lines of text for TV subtitle effects.
Ribbon Emitter
This Ribbon Emitter connects particles (or sprites) into a seamless stripe; create circling, twirling or trailing animations in 3D space. Widely used for casting magic spells, or simulating a swimming school of fish, wiggling snakes or hovering insects.
Mesh Emitter
This Mesh Emitter Tool can spit out 3D meshes with up to 4 meshes as the particle source. You get higher visual realism, full-calibre physics capabilities, and perfect collision simulations.
Texture Emitter
The classic Texture Tool emits image billboards (or decals), which can either be selected from a sprite sheet, or from a single image. It’s frequently used to create effects like fog, rain, smoke, bubbles, fire and explosions.
The ability to fully manipulate your motion clips is an incredibly powerful feature that allows you to achieve basically any sort of animation result in a few simple minutes by modifying things like transition curve, time warp, speed, and transition areas. In this tutorial, you'll learn how to do things like blend your clips together, easily copy and paste them, modify their speed, and more! This is an essential tutorial for anyone who wants to animate with CrazyTalk Animator 3, and should not be missed!
The ability to generate your own custom metal surfaces is a powerful new feature in Character Creator 2.0. This new update features a stunning selection of embedded metal substance material presets to start from in addition to an eclectic variety of useful parameters that you can adjust to truly customize your metal down to the smallest detail. In this tutorial, you will get an introduction on how to use the metal substance presets embedded in Character Creator 2.0. You'll also learn all about the various properties that you can modify to really create your own unique props with any type of metal surface you can imagine!
Character Creator 2.0 has the upgraded ability to edit the mesh of any of your props from iClone 7. The new Mesh Editor gives you complete control over not only how your accessories fit on to your character's unique body, but also provides the option to modify and sculpt the mesh of any prop you import! This tutorial will walk you through the steps of how the new Edit Mesh Mode provides you with the long-awaited and powerful tools you need to completely customize props from the iClone library, and also shows you how you can create your own stylish hat from scratch using nothing but simple primitive shapes in iClone.
In this tutorial, we will show you how to create your own animated facial features for your G3 characters. Customizing your own animated facial features is the most difficult part of animation, but once you are familiar with it, you will be able to master facial animations. Note: You need CrazyTalk Animator 3.1 Pipeline version for this
In this tutorial, we will demonstrate how easy it is to customize and animate a 2D character in CTA3.1 Pipeline version. After 6 sprite-based body parts – head, torso, legs and arms are created, you then used the CTA3 PSD template for structural instructions on how to create an instantly animatable PSD character. In order to animate your PSD character, you need to watch out for the pivot point alignments and layer orders. If you follow the tutorial, and the PSD template then this will help you easily setup the G3 character bone structure for animation. Note: You need CrazyTalk Animator 3.1 Pipeline version for this
In this tutorial, we are going to show you a quick solution for adding animatable facial parts to your G3 characters. First, you may notice that you cannot create facial animations for a character that only has a face image. You need animatable facial parts. Instead of creating facial features one by one, you can add ready-made facial parts in CTA 3.1 through a PSD template that we provide. Note: You need CrazyTalk Animator 3.1 Pipeline version for this